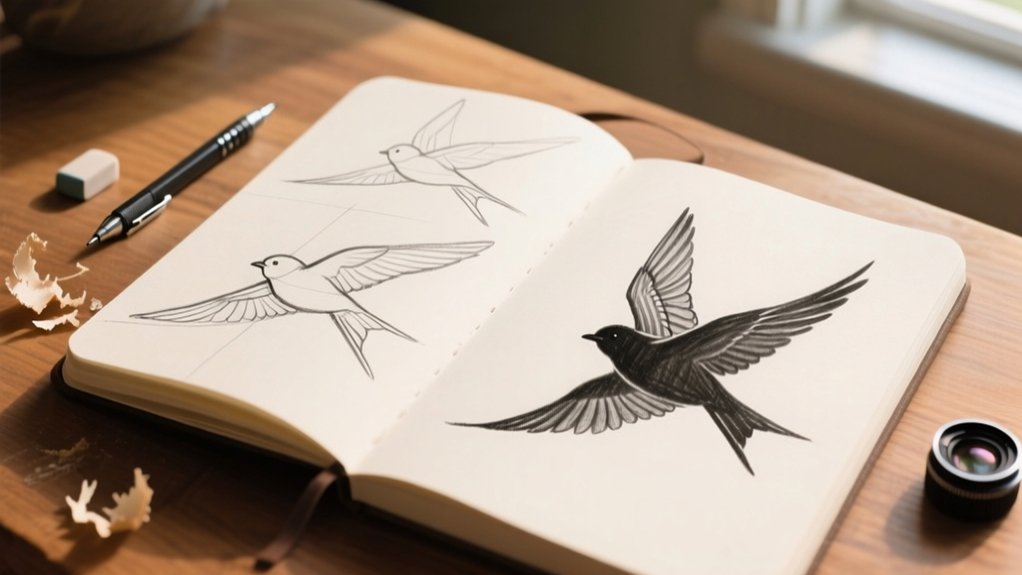
Start by sketching simple shapes: an oval for the body and a circle for the head. Connect them with a curved neck line to capture the bird’s posture. Use light, loose lines to position wings and tail, paying attention to angles for a natural flying pose.
Study wing anatomy. Primary feathers extend from a sturdy skeletal frame shaped by muscles and elastic skin. Layer feathers with directional strokes to build texture, and emphasize key features like the eye for realism.
Keep going, and you’ll reveal advanced tips that make your flying birds come alive.
Understanding Bird Anatomy and Flight Structure
Mastering how birds fly starts with understanding their unique anatomy and flight structure. You’ll notice their bones are hollow, reinforced with thin cross pieces, reducing weight without sacrificing strength.
The fused vertebrae provide a sturdy, stable spine, though this limits flexibility. The massive keel bone, extending perpendicular from the ribs, anchors powerful flight muscles vital for lift and thrust.
Their wings consist of a precise skeletal framework: humerus, radius, ulna, and fused wrist bones. These support flight feathers that attach directly to bones, not just skin. Flight feathers enable flying and steering by creating aerodynamic panels on the wings.
The elastic propatagium stretches from shoulder to wrist, shaping the wing for ideal lift.
This lightweight, rigid skeleton combined with specialized muscles enables birds to generate lift, thrust, and maneuverability. All these are essential for smooth, controlled flight you’ll want to capture accurately in your drawings.
Simplifying Bird Shapes for Accurate Proportions
With an understanding of how bird anatomy supports flight, you can begin to simplify their complex forms into basic shapes to capture accurate proportions.
Start by sketching an oval for the body and a circle above it for the head, connecting them with a curved line to form the neck.
Begin with an oval for the body and a circle above for the head, linked by a gentle neck curve.
Use elongated ovals to mark tail placement and angle. Measure the head size to set body length, usually one and a-half to two times the head’s length, and align the eye horizontally on the head circle.
Position the beak according to species-specific ratios, noting its angle relative to the forehead.
Assess wing and tail angles to suggest natural posture and movement. Evaluate negative spaces, like the triangle formed between wings, to confirm spacing and improve accuracy.
Understanding the bird’s posture and the angles of the body and head alignment is essential for capturing the unique characteristics of different bird species posture and angles.
This methodical simplification streamlines your drawing process while ensuring lifelike proportions.
Gathering and Using Reference Materials Effectively
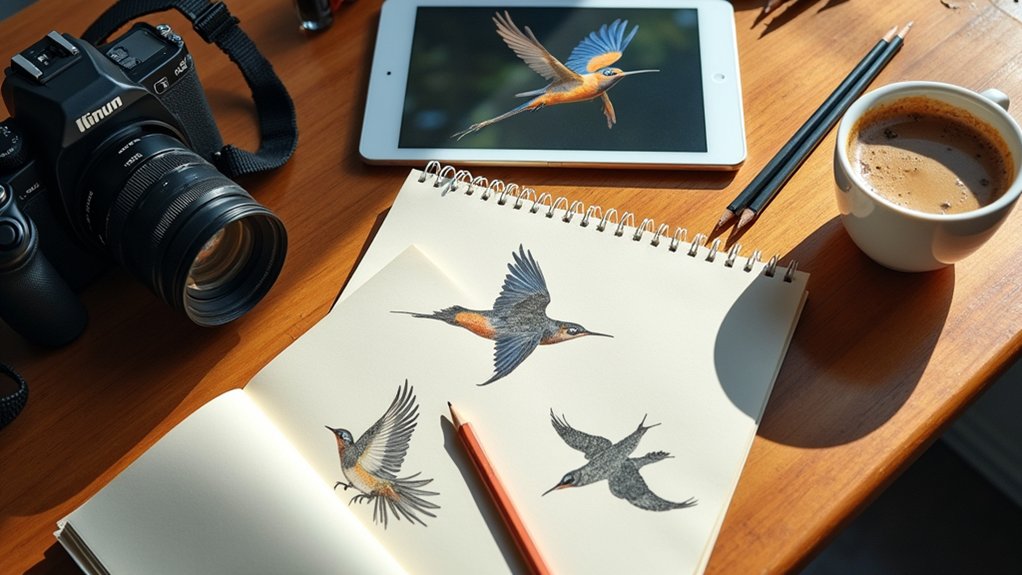
Although drawing birds from life offers valuable practice, relying on quality reference materials greatly improves your ability to capture accurate details and dynamic poses.
Start by selecting high-quality photographs with natural lighting, showcasing various angles and wing positions to study plumage texture, color gradients, and beak shape.
Print these images at your finished drawing size for precise measurement. Using the grid system can help maintain correct proportions when transferring the reference to your drawing surface. Supplement photos with anatomical guides to understand feather tracts, joint placement, and wing folding.
Organize your references into categorized collections or mood boards by species, pose, or behavior to streamline access and inspire diverse compositions.
Pay close attention to lighting and angles, noting how shadows and silhouettes shift during flight.
Using multiple sources together enhances your drawing’s accuracy and depth, helping you depict birds as lifelike and dynamic subjects.
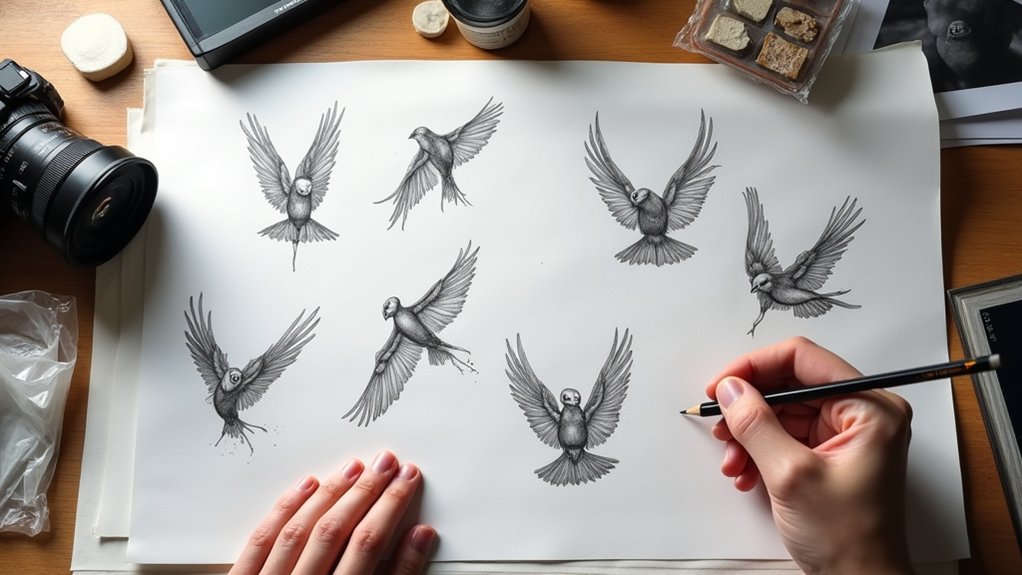
Establishing Basic Body and Wing Placement
When you begin sketching a bird in flight, start by establishing the basic placement of the body and wings using simple shapes like circles, ovals, and teardrops. Use circles and ovals to mark the body mass, focusing between the breast and rump, while teardrops outline the wings’ general form. Light, loose lines help you adjust proportions without committing too early. Draw a central axis through the body to set the bird’s orientation and balance, ensuring the pivot point aligns near the thoracic cavity where wings attach. Position the wings relative to the body—above, aligned with, or below the tail—based on flight phase, using curved lines for natural wing contours. The syrinx, located where the trachea divides into bronchial tubes, is an important anatomical feature related to the bird’s vocal abilities during flight. Assess angles between head, neck, and wings to capture realistic posture and forward momentum before refining details.
Constructing Wings and Tail Using Negative Space
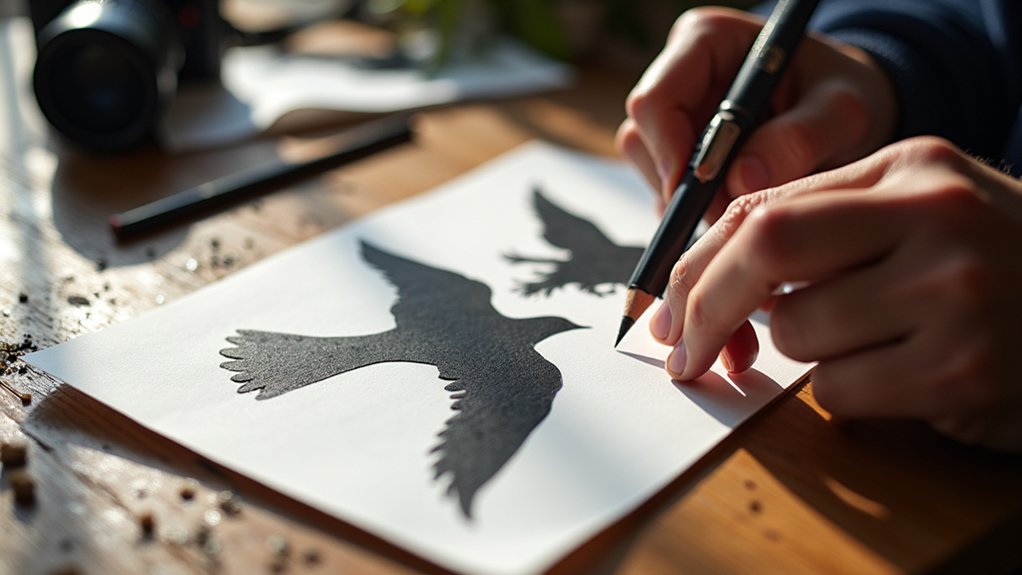
Because negative space reveals the invisible framework between a bird’s wings and tail, you can use it to accurately construct their shapes and positions.
Begin by identifying the triangular negative space formed between the wings; this acts as a precise anchor for mapping wing placement and ensuring symmetry.
Start by locating the triangular negative space between wings to anchor accurate wing placement and symmetry.
Observe the angles created where wings meet the body and where the tail extends, marking straight lines to guide their directional relationship.
Use the gaps between overlapping feathers and wing edges to simplify complex outlines, sketching blunt, basic silhouettes before adding details. This approach highlights how negative space encompasses the area around the object, helping you focus beyond just the bird’s form.
Constantly assess proportional relationships by comparing these negative spaces around wings and tail to the body’s dimensions.
This method helps you maintain accurate structure and three-dimensional positioning, making your flying bird sketches both balanced and dynamic.
Refining Body Contours and Adding Feather Details
You’ll want to carefully refine the bird’s body shape with smooth, flowing contours that reflect its natural posture and muscle structure.
Think about how the bird naturally holds itself and try to capture that in your lines. Use light, directional strokes to build up feather texture, following the growth patterns unique to each species. This helps make the feathers look more realistic and gives your drawing a lifelike feel.
Also, pay close attention to the contour lines—they can subtly suggest the form beneath the feathers and really improve the sense of volume. Understanding bird anatomy aids in accurate drawing, including knowledge of hidden joints and feather groups.
Just take your time, and let those details come together naturally.
Body Shape Refinement
As you move beyond the basic shapes, focus on refining the bird’s body contours by carefully defining the subtle curves and changes between sections.
Start by establishing a center line along the breast to maintain symmetry. When sketching, consider how various beak types relate to the overall anatomy and posture of the bird in flight.
Pay close attention to the shifts between the throat, upper chest, and neck, marking the delicate angle changes where body segments connect.
Identify and sketch the negative spaces between distinct parts to improve clarity.
Use straight lines to assess proportions, especially where the head joins the body and where the tail extends.
Outline the feather tracts beneath the surface, distinguishing primary flight feathers from wing coverts, but avoid individual feather details here.
This approach guarantees your drawing captures the bird’s balanced mid-flight posture with accurate volume and natural curvature.
Familiarity with birds aids in this process by allowing you to recognize key features and anatomical details that enhance the accuracy of your drawing.
Feather Texture Techniques
Refining the bird’s body contours sets the stage for adding feather texture, where careful stroke direction and layering bring your drawing to life.
Begin with short, directional pencil strokes. S-curves and C-curves mimic natural feather patterns.
Apply a mid-tone base layer to establish body and wing shadows before detailing individual feathers. Remember, feathers overlap in neat rows, with those closest to the body partially covering outer feathers. Investing time in accuracy here ensures a solid foundation for your drawing.
So, shade between layers to create depth.
Follow feather direction precisely: tail feathers point backward, and facial feathers radiate from the eye. Use fine, quick strokes for delicate chest feathers, while head feathers require lighter, fur-like lines.
Shade feather centers darker on one side, blending softly to emphasize volume and texture.
This gradual layering technique adds realistic dimension without cluttering your drawing.
Contour Line Detailing
A confident contour line sets the foundation for bringing your bird drawing to life through precise body shaping and feather detailing.
Begin by refining the rough outline with decisive, broad strokes, replacing loose sketches with stronger, confident lines.
Observe the bird’s posture carefully, adjusting the back contour, whether straight or bent, to reflect a natural stance. Incorporate subtle feather grooves and definition lines around the belly and breast to indicate plumage direction.
Emphasize the eye area for focal interest, using contour angles along the perimeter to suggest the bird’s rounded yet edged form.
Add fluid S- and C-curves to convey dynamic movement, especially along the wings and tail.
To improve accuracy, it is helpful to learn basic anatomy, which allows you to understand how different parts fit together visually.
These refined contours balance anatomical accuracy with organic flow, creating a vivid, lifelike bird ready for flight.
Techniques for Coloring and Final Touches
When you start applying color to your bird drawing, choose pigments that closely match the natural hues seen in your reference image under natural light.
Begin with a light, even base layer, using a smaller brush for detailed areas like the head and beak. Build color gradually with multiple thin layers to maintain symmetry and natural texture.
Next, focus on shading by laying down darkest tones first, blending midtones softly to create depth. Pay special attention to the eye and beak, adding tiny strokes and preserving highlights for realism. The eye serves as a focal point in bird drawings, so enhancing it carefully adds significant visual depth.
Finally, refine feather texture and add highlights with erasers or white paint. Here’s a quick guide:
- Apply base colors evenly, building layers slowly
- Shade darkest areas first, blend smoothly
- Detail eyes and beak with precise strokes
- Add highlights and refine textures carefully
Frequently Asked Question
What Are the Best Tools for Sketching Birds in Flight?
You’ll want a mechanical pencil with HB leads for crisp, consistent lines capturing wing edges and feather details.
A range from 2H to 6B graphite pencils helps you vary shading depth realistically.
Use smooth bristol paper for blending and fine work, plus textured paper to mimic feather texture.
Keep kneaded and precision erasers handy for highlights and corrections.
Blending stumps smooth tonal shifts, while proportional dividers guarantee accurate bird-to-wing ratios.
How to Capture Motion Blur Effects in Bird Drawings?
To capture motion blur in bird drawings, focus on shading wing feathers with a middle line technique. Shade the left side darker and highlight the right. Use blending sticks to smooth edges, creating a seamless shift into the background.
Keep the bird’s body sharp while blurring wings slightly, mimicking shutter speeds around 1/15 to 1/60 seconds.
This balance evokes speed and grace without losing realism or dimensional depth.
Can I Draw Flying Birds Without Any Prior Bird Knowledge?
Yes, you can draw flying birds without any prior bird knowledge. Start by using simple shapes like ovals for bodies and circles for heads, adding curved lines to indicate wings.
Focus on overall form and motion rather than intricate anatomy. Use long, flowing lines to suggest flight direction.
Keep your sketches rough at first, refining details only after the main shapes look right.
Practice regularly, and you’ll improve naturally.
How Long Does It Typically Take to Master Bird Flight Sketches?
Mastering bird flight sketches can feel like capturing lightning in a bottle. It might take months or even years depending on how often you practice. You’ll need to observe wing shapes, feather flow, and dynamic poses closely.
By sketching regularly and studying real birds or videos, you’ll refine your timing and precision. Don’t rush; focus on understanding anatomy and movement.
With dedication, your sketches will soar realistically before you know it.
Are Digital or Traditional Mediums Better for Bird Illustrations?
You’ll find digital mediums better if you want flexibility.
Zooming, layering, and easy corrections speed up refining bird illustrations.
Traditional art, however, offers unique texture and originality.
It gives your work a tactile depth digital can’t replicate.
Your choice depends on priorities.
Go digital for convenience and editing ease; choose traditional if you value authenticity and collector appeal.
Both have financial and technical demands, so weigh what suits your workflow and goals best.
Conclusion
By boldly breaking down bird bodies and balancing wingbeats, you’ve built a brilliant base for beautiful bird drawings. Remember, mastering motion means mindful measurement and meticulous mark-making.
Keep keenly keen on key details like feather flow and flight form to capture enchanting creatures in crisp clarity. With practice, patience, and persistent pencil pressure, your soaring sketches will shine spectacularly.
So, spread your skills and let your art take flight!