Preparing a bird for cooking or other uses starts with an essential and sometimes overlooked step—removing the feathers. Whether you’re a homesteader, hunter, or someone learning traditional practices, knowing how to remove feathers from a dead bird is a useful skill that connects you directly to your food source. It’s not just about getting the job done; it’s about doing it cleanly, humanely, and efficiently.
This process can seem intimidating at first, especially if you’re new to it, but with a little guidance, it becomes manageable and even rewarding. There are several methods to choose from, including dry plucking, scalding, or waxing, each suited to different types of birds and end uses. In this guide, we’ll walk you through step-by-step instructions on how to remove feathers from a dead bird, with tips to make the job easier and less messy. Whether you’re preparing poultry for the table or learning self-sufficiency, it all begins with the basics.
Preparing for Feather Removal
Before you begin the actual process of removing feathers from a dead bird, it’s important to set yourself up for success. Preparation is key to making the task more efficient, hygienic, and safe. By taking the time to gather your tools, select the right environment, and protect yourself properly, you’ll ensure a smoother experience and reduce the risk of contamination or injury. Here’s how to prepare the right way.
Gather Necessary Tools and Materials
Start by collecting all the equipment you’ll need for the feather removal process. Having everything on hand beforehand will prevent unnecessary interruptions. You’ll need a sharp knife or poultry shears for basic processing, as well as a large pot or container if you plan to scald the bird to loosen the feathers. Make sure you have access to water and a reliable heat source to bring it to a boil.
Wear gloves—rubber or latex are ideal—for sanitation and grip. An apron or a set of old clothes will help protect you from water and debris. Keep clean towels or cloths nearby for drying, and have a bucket or trash bag ready to collect feathers. If you’re using the wax or dry-plucking method, gather any specific materials required in advance to avoid delays during the process.
Choose a Safe and Clean Work Area
Selecting the right work area is just as important as having the right tools. Feather removal can be messy, so you’ll want a space that’s easy to clean and provides enough room to work comfortably. An outdoor space like a backyard or garden is often the best option because it offers ventilation and simple cleanup. If you must work indoors, choose a location like a garage, utility room, or other area with washable surfaces.
Make sure the space is well-ventilated and free from pets or distractions. Use a sturdy, flat surface for plucking and have access to water nearby for rinsing and scalding. Most importantly, sanitize your workspace both before and after use to minimize the risk of spreading bacteria, especially if the bird will be used for consumption.
Wear Protective Gear
Wearing proper protective gear is a critical part of staying safe and clean throughout the feather removal process. Although the task isn’t particularly dangerous, it does involve handling raw poultry, hot water, and sharp tools. Wearing gloves helps maintain hygiene and gives you a better grip on feathers. An apron or old clothing will protect your body from splashes, feathers, and other mess. If you’re scalding the bird, consider wearing eye protection as well to guard against hot water splashes. Taking these precautions will help ensure a safer and more efficient plucking experience.
Initial Bird Preparation
Before you begin removing feathers, it’s important to properly prepare the bird. This step ensures that the bird is safe to handle, clean for processing, and ready for the method of feather removal you’ve chosen. Skipping or rushing this part can lead to contamination or make the rest of the process more difficult than it needs to be. Here’s how to get started with initial bird preparation.
Inspect the Bird for Damage or Disease
The first thing you should do is carefully inspect the bird. Whether it’s from a hunt, farm, or backyard flock, check for any signs of disease, infection, or unusual injury. Look closely at the eyes, beak, feathers, and skin. Indicators such as discolored or cloudy eyes, abnormal lumps, missing patches of feathers, or any strange odors could suggest the bird is not suitable for consumption. Also, check for obvious injuries like broken bones or open wounds that may have occurred during capture or dispatching. If you notice anything concerning and you’re unsure about the bird’s condition, it’s best to err on the side of caution and consult a professional or dispose of the bird responsibly. Only proceed with birds that appear healthy and intact.
Clean the Bird if Necessary
Once the bird has passed inspection, the next step is to clean off any visible dirt, debris, or blood. This is particularly important if the bird has been field-dressed or has come into contact with soil, leaves, or other contaminants. Start by gently wiping down the bird with a damp cloth or rinsing it lightly with cool water. Avoid soaking the bird entirely at this stage, as too much moisture can make feather removal harder and more slippery, especially if you’re dry-plucking.
If the bird is particularly dirty, you can use a small brush to remove stuck-on material, but be gentle to avoid damaging the skin. Make sure to check under the wings, around the legs, and along the belly for hidden debris. The goal is not to fully wash or disinfect the bird at this point, but simply to remove anything that could get in the way during the plucking process.
Methods of Feather Removal
Once your bird is properly inspected and cleaned, it’s time to begin the feather removal process. There are several methods you can use, and the best one often depends on the type of bird you’re working with, the tools you have available, and your personal preference. The three most common methods are dry plucking, wet plucking (with scalding), and wax plucking. Each has its pros and cons, and understanding the techniques involved will help you choose the right approach for your needs.
Dry Plucking
Dry plucking is the most traditional method of feather removal and doesn’t involve any water or heat. It’s a straightforward technique where feathers are pulled out by hand from the bird shortly after death, while the body is still warm.
Best Birds for Dry Plucking
Dry plucking is ideal for small game birds like quail, pigeons, or doves, as well as freshly harvested chickens or ducks if you intend to preserve the skin’s appearance. It’s particularly useful when you’re preparing birds for roasting and want to keep the skin intact and crisp.
Step-by-Step Dry Plucking Process
- Begin while the bird is still warm. This makes feather removal easier and reduces skin tearing.
- Start with larger feathers. Begin at the wings and tail, removing these tougher feathers first.
- Work against the direction of growth. Pull feathers in the opposite direction they grow, using short, firm tugs.
- Use caution with delicate skin. Hold the skin taut with one hand to prevent tearing.
- Finish with smaller feathers and pinfeathers. A paring knife or tweezers can help with any stubborn spots.
Dry plucking can be time-consuming and labor-intensive, but it leaves a cleaner finish without introducing moisture to the bird
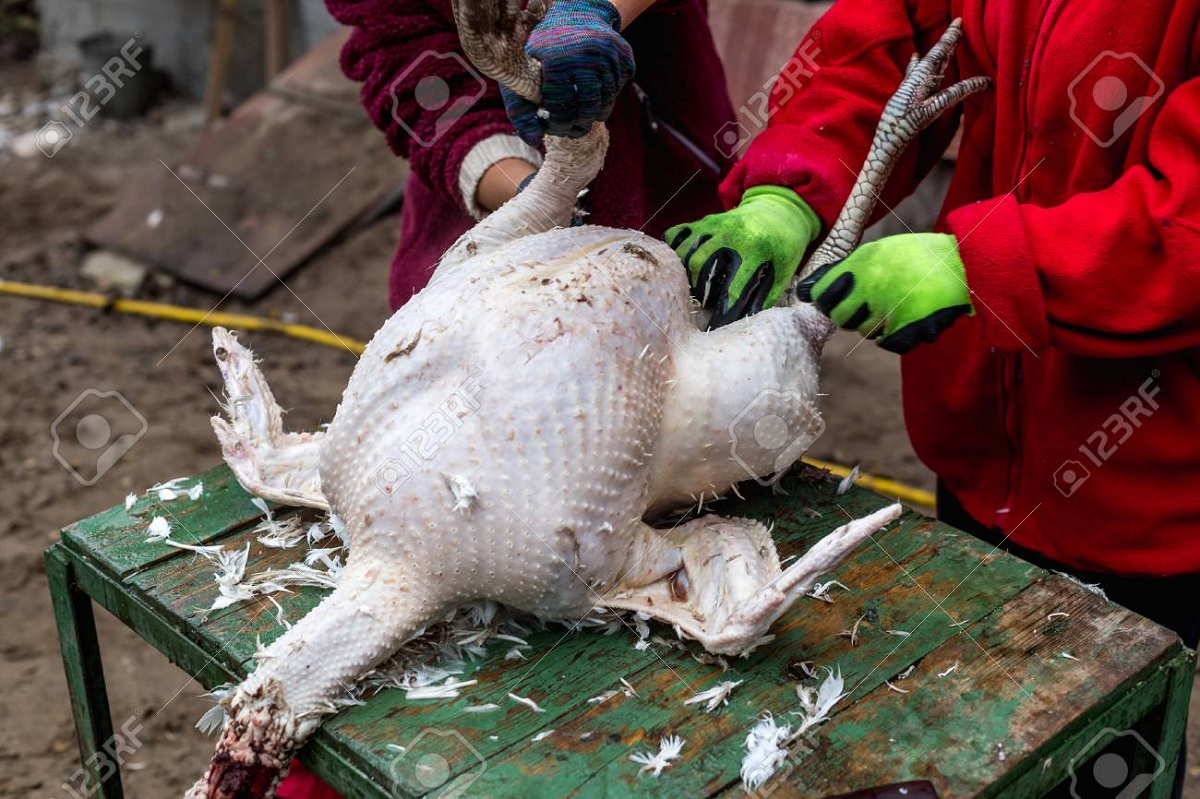
Wet Plucking
Wet plucking is a more efficient and widely used method that involves scalding the bird in hot water to loosen the feathers, making them much easier to remove. This technique is especially popular for poultry like chickens, turkeys, and ducks. It’s faster than dry plucking and ideal when processing multiple birds. The key to success with wet plucking lies in properly scalding the bird before you begin removing feathers.
Scalding the bird is the first step in the wet plucking process. It helps to soften the skin and loosen the feather follicles, which allows for quicker and less forceful plucking. To do this, fully submerge the bird in a pot of hot water. As you dip it, gently move or agitate the bird to ensure all areas—especially the wings and underparts—are exposed evenly to the hot water. This consistent exposure makes feather removal easier and more uniform.
Timing and temperature are critical to effective scalding. The water should be maintained at a temperature between 130°F and 150°F (54°C to 65°C). For best results, keep the bird submerged for about 30 to 60 seconds, adjusting the time slightly depending on the size of the bird and the type of feathers it has. You’ll know the bird is ready when the feathers come off easily with minimal effort, especially around the wing area. Be cautious not to over-scald; overheating can start to cook the skin, making it rubbery and difficult to work with.
Plucking after scalding should be done immediately while the skin is still warm and the feathers remain loosened. Use your hands or a mechanical plucking tool, starting with the larger feathers on the wings and tail before moving to smaller body feathers. This method greatly reduces the time and effort required to completely defeather a bird, making it a go-to process for both homesteaders and small-scale poultry processors.
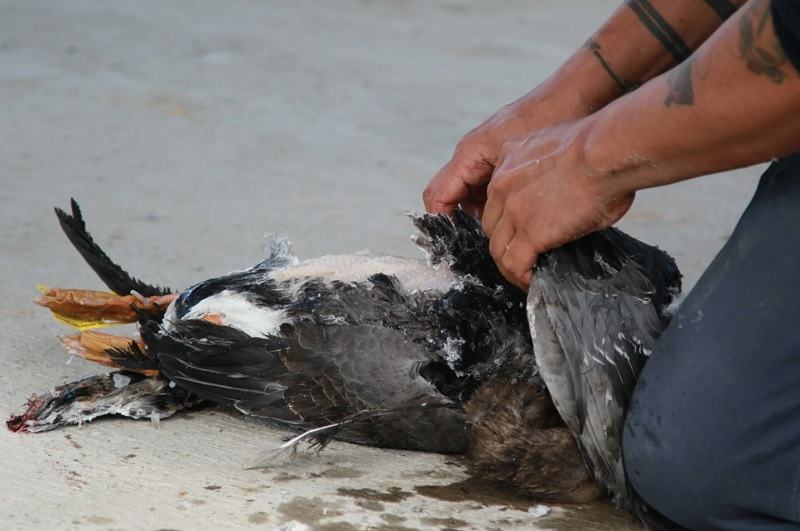
Wax Plucking
Wax plucking is a specialized feather removal method typically reserved for birds with dense feather coverage, such as ducks and geese. These birds have thick layers of down that can be difficult to remove completely using dry or wet plucking alone. Wax plucking offers a cleaner, more polished finish, which is especially useful if the bird will be presented whole for sale or cooking.
Knowing when to use wax plucking is important. This method is most effective when you’re dealing with birds that have stubborn, fine feathers or thick down that won’t come off easily with traditional plucking. It’s also ideal if you want to remove pinfeathers completely or ensure a smooth appearance for display or culinary presentation.
To apply and remove wax, begin after the bird has been initially plucked and scalded. Heat paraffin or poultry wax in a pot until it’s fully melted. Carefully dip the bird into the wax, ensuring it gets a thorough, even coating—especially over any remaining feathered areas. Immediately after dipping, place the bird into a container or sink filled with cold water. The temperature change will harden the wax into a solid shell around the bird. Once the wax is firm, peel it off in large sheets. The remaining fine feathers and down should come off easily with the wax, leaving you with a clean, smooth bird.
Although wax plucking requires more time and preparation, the results are unmatched in terms of cleanliness and presentation. It’s a worthwhile method for waterfowl and any situation where a neat appearance is important.
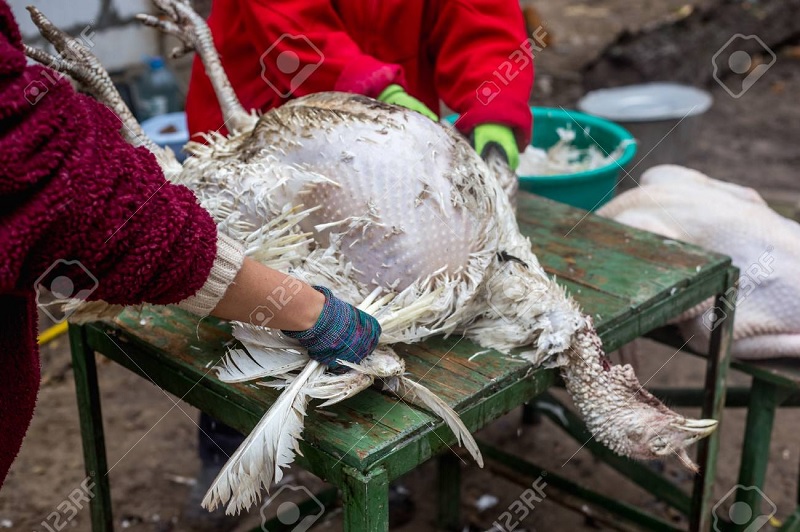
Post-Plucking Clean-up
After the main plucking process is complete, the bird may look mostly clean, but there are still a few important finishing touches to take care of before it’s ready for cooking or storage. The post-plucking clean-up ensures that the bird is thoroughly prepared, sanitary, and free from any leftover feathers or debris. This stage is quick but essential, and it plays a big role in the overall quality of the finished product.
Remove Remaining Pinfeathers
Even after thorough plucking—whether dry, wet, or wax—small pinfeathers or hair-like feathers may still cling to the skin. These can be stubborn and are usually most visible on the wings, legs, and under the skin folds. Removing them not only improves the bird’s appearance but also ensures a better texture if you’re planning to cook it with the skin on.
To remove pinfeathers, use a pair of tweezers, a paring knife, or your fingers to gently pull them out. Tweezers are especially helpful for gripping the fine, short feathers without tearing the skin. In some cases, you can singe off tiny hairs or leftover feathers using a lighter or small kitchen torch, but this should be done carefully and in a well-ventilated area. Take your time with this step—attention to detail here will result in a cleaner, more professional finish.
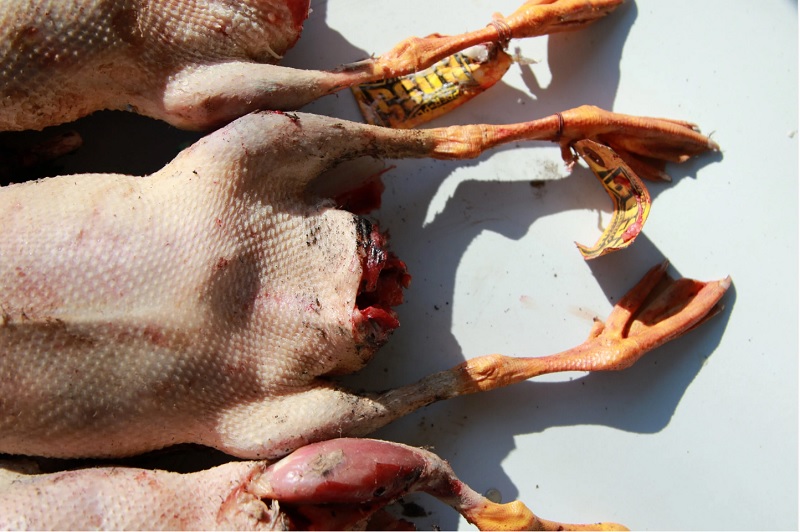
Wash and Rinse the Bird
Once all visible feathers and pinfeathers are removed, it’s time to give the bird a final wash. This is a critical step for ensuring cleanliness, especially if the bird came into contact with soil, blood, or other contaminants during the plucking process. Rinse the bird thoroughly inside and out with cool, clean water. Pay special attention to crevices like under the wings and around the legs, where residue and fine feathers can collect.
You can use a soft brush or cloth to help remove any remaining particles stuck to the skin. Avoid using hot water at this stage, as it can start cooking the outer skin layers. After rinsing, pat the bird dry with clean paper towels or a lint-free cloth. Once dry, the bird is ready for refrigeration, freezing, or immediate preparation, depending on your needs.
Disposal and Sanitation
After you’ve finished plucking and preparing your bird, the job isn’t quite done. Proper disposal of feathers and waste, along with thorough cleaning and sanitizing of your tools and workspace, is essential for maintaining hygiene and preventing any health risks. Taking these steps seriously protects you and anyone else who might handle the bird or be near your workspace later.
Proper Disposal of Feathers and Waste
Feathers, skin scraps, and other bird waste should never be left lying around, as they can attract pests and spread bacteria or disease. The best way to dispose of these materials depends on your local regulations and available resources. In many cases, placing feathers and waste in a sturdy trash bag for curbside pickup is sufficient. If you have a compost system that accepts animal by-products, feathers can sometimes be composted, but be sure to confirm if this is allowed in your area.
If you’re processing multiple birds, designate a specific container or bin for feather and waste collection to keep your workspace organized and clean throughout the process. Never discard feathers or bird waste near vegetable gardens or water sources to avoid contamination. In rural areas, some people choose to burn feathers, which can be effective, but this should only be done safely and legally.
Cleaning and Disinfecting Tools and Area
After all waste has been cleared, focus on cleaning and disinfecting your tools and workspace to prevent cross-contamination. Start by rinsing knives, scissors, plucking tools, and containers with hot, soapy water to remove any organic material. Use a stiff brush to scrub any hard-to-reach areas.
Once clean, disinfect your tools with a food-safe sanitizer or a diluted bleach solution (about one tablespoon of bleach per gallon of water). Soak or wipe the tools thoroughly, then rinse with clean water and allow them to air dry.
The work area should also be cleaned thoroughly. Wipe down all surfaces with hot, soapy water, then apply a disinfectant suitable for kitchen or food prep areas. Pay special attention to countertops, tables, and any buckets or containers used during plucking. Finally, wash your hands thoroughly with soap and warm water, and launder any clothing or aprons used during the process.
Tips and Troubleshooting
Feather removal can sometimes be tricky, especially if it’s your first time or you’re working with a bird that has tough feathers. Knowing a few helpful tips and how to troubleshoot common issues can save you time, reduce frustration, and improve your results. Here’s what to keep in mind to make the process smoother and more effective.
Common Mistakes to Avoid
One of the most common mistakes is starting the plucking process when the bird’s body is too cold. Feathers come out much easier when the bird is still warm, so aim to pluck within a short window after dispatch. Waiting too long can cause the skin to tighten and feathers to become more difficult to remove.
Another frequent error is scalding at an incorrect temperature or for too long. If the water is too hot or the bird is submerged for too long, the skin may start cooking or toughening, which makes plucking harder and can damage the meat. On the other hand, water that’s not hot enough won’t loosen the feathers effectively. Always monitor your water temperature carefully and stick to recommended timing guidelines.
Rushing the process can also lead to torn skin and uneven plucking. Take your time, especially around sensitive areas like wings and the neck. Using too much force or pulling feathers against the grain can result in skin damage, so be gentle and patient.
Dealing with Tough or Stubborn Feathers
Some feathers, especially small pinfeathers or those on waterfowl, can be stubborn and resist removal. If you encounter these, try re-scaling the bird briefly by dipping it again in hot water for 10-15 seconds to loosen the feathers further without overheating the skin.
For pinfeathers or small clusters that won’t come out with hand plucking, use tweezers to carefully grasp and pull them out. A paring knife can help loosen stubborn feathers by gently scraping the skin, but use caution to avoid cutting.
If you’re consistently struggling with down feathers or very fine ones, consider trying wax plucking, which can be more effective at removing these hard-to-reach feathers in one step.
Finally, keep the bird moist throughout the process if you’re wet plucking. Dry skin can make feathers stick harder, so periodically dipping the bird in water can make plucking easier.
Frequently Asked Questions
How Do You Remove Feathers From A Dead Bird Safely?
To remove feathers safely from a dead bird, start by preparing your workspace and gathering the necessary tools like gloves, a sharp knife or poultry shears, and a container for feathers. Choose a clean, well-ventilated area to work in, preferably outdoors or in a space you can easily clean afterward. Always wear protective gloves to avoid direct contact with bacteria or contaminants. Begin by inspecting the bird for any damage or disease, then decide on the feather removal method—dry plucking, wet plucking with scalding, or wax plucking. Handle the bird gently to avoid tearing the skin, and take your time to avoid injury from sharp tools. Following these safety steps helps ensure a smooth process without risk to you or the quality of the bird.
What Is The Best Method To Remove Feathers From Different Types Of Birds?
The best feather removal method depends on the bird type. For small game birds like quail or doves, dry plucking works well because it preserves the skin’s texture. For larger birds such as chickens, turkeys, and ducks, wet plucking with scalding is more efficient. Scalding loosens feathers and speeds up removal. For waterfowl like ducks and geese, wax plucking is sometimes used to remove stubborn down and fine feathers. Each method has pros and cons, so choose based on your bird type, available tools, and desired outcome. Wet plucking is generally preferred for most poultry due to its speed and effectiveness.
How Long Should You Scald A Bird For Feather Removal?
Scalding is a critical step in wet plucking and should be done carefully to avoid damaging the bird’s skin. Maintain water temperature between 130°F and 150°F (54°C to 65°C). Submerge the bird for about 30 to 60 seconds, adjusting slightly based on the bird’s size and feather density. You’ll know the bird is ready when feathers begin to loosen easily, especially around the wings. Avoid over-scaling, as too much heat can cook the skin and make plucking difficult. Proper timing and temperature ensure easier feather removal and better skin quality.
How Can You Remove Small Pinfeathers That Are Hard To Pluck?
Small pinfeathers can be frustrating because they often remain after the main plucking. To remove them, you can use tweezers to carefully grasp and pull out these stubborn feathers without damaging the skin. Alternatively, a paring knife can be used to gently scrape or loosen them. Another effective method is singeing with a small kitchen torch or lighter, which burns off fine hairs safely when done carefully. For birds with lots of down feathers, wax plucking can help remove pinfeathers more thoroughly in one go. Always work slowly and gently to avoid skin tears.
Can You Remove Feathers Without Damaging The Skin?
Yes, you can remove feathers without damaging the skin by following the right techniques. Start plucking when the bird is still warm, as this makes feathers come out more easily. Use gentle, steady pressure rather than forceful tugs, and always pull feathers in the opposite direction of growth while holding the skin taut with your other hand. Scalding before plucking softens the skin and loosens feathers, reducing the chance of tears. Avoid rushing and take special care around delicate areas like wings and neck. Proper preparation and technique are key to preserving the skin’s integrity.
What Should You Do With Feathers And Waste After Plucking?
Proper disposal of feathers and waste is important for hygiene and environmental reasons. Collect feathers and any skin scraps in a dedicated bucket or heavy-duty trash bag. Avoid leaving them exposed as they can attract pests and spread bacteria. Check your local regulations: in some areas, feathers can be composted safely, while others require disposal via trash or specialized waste services. Burning feathers is an option in rural areas but should be done legally and safely. After disposal, clean and disinfect your tools and workspace thoroughly to prevent contamination in future use. This ensures a clean and safe environment for you and others.
Conclusion
Removing feathers from a dead bird can seem challenging, but with the right preparation and method, it becomes much easier and more efficient. Whether you choose dry plucking, wet plucking with scalding, or wax plucking, understanding each technique and following key safety and hygiene steps ensures a clean, well-prepared bird.
Remember to prepare your workspace, use proper tools, and take your time to avoid damaging the skin. Post-plucking clean-up and proper disposal of feathers are just as important to maintain hygiene and safety. With practice and attention to detail, you’ll gain confidence and skill in handling this process smoothly every time.